Optical Components That Keep Projectors Working
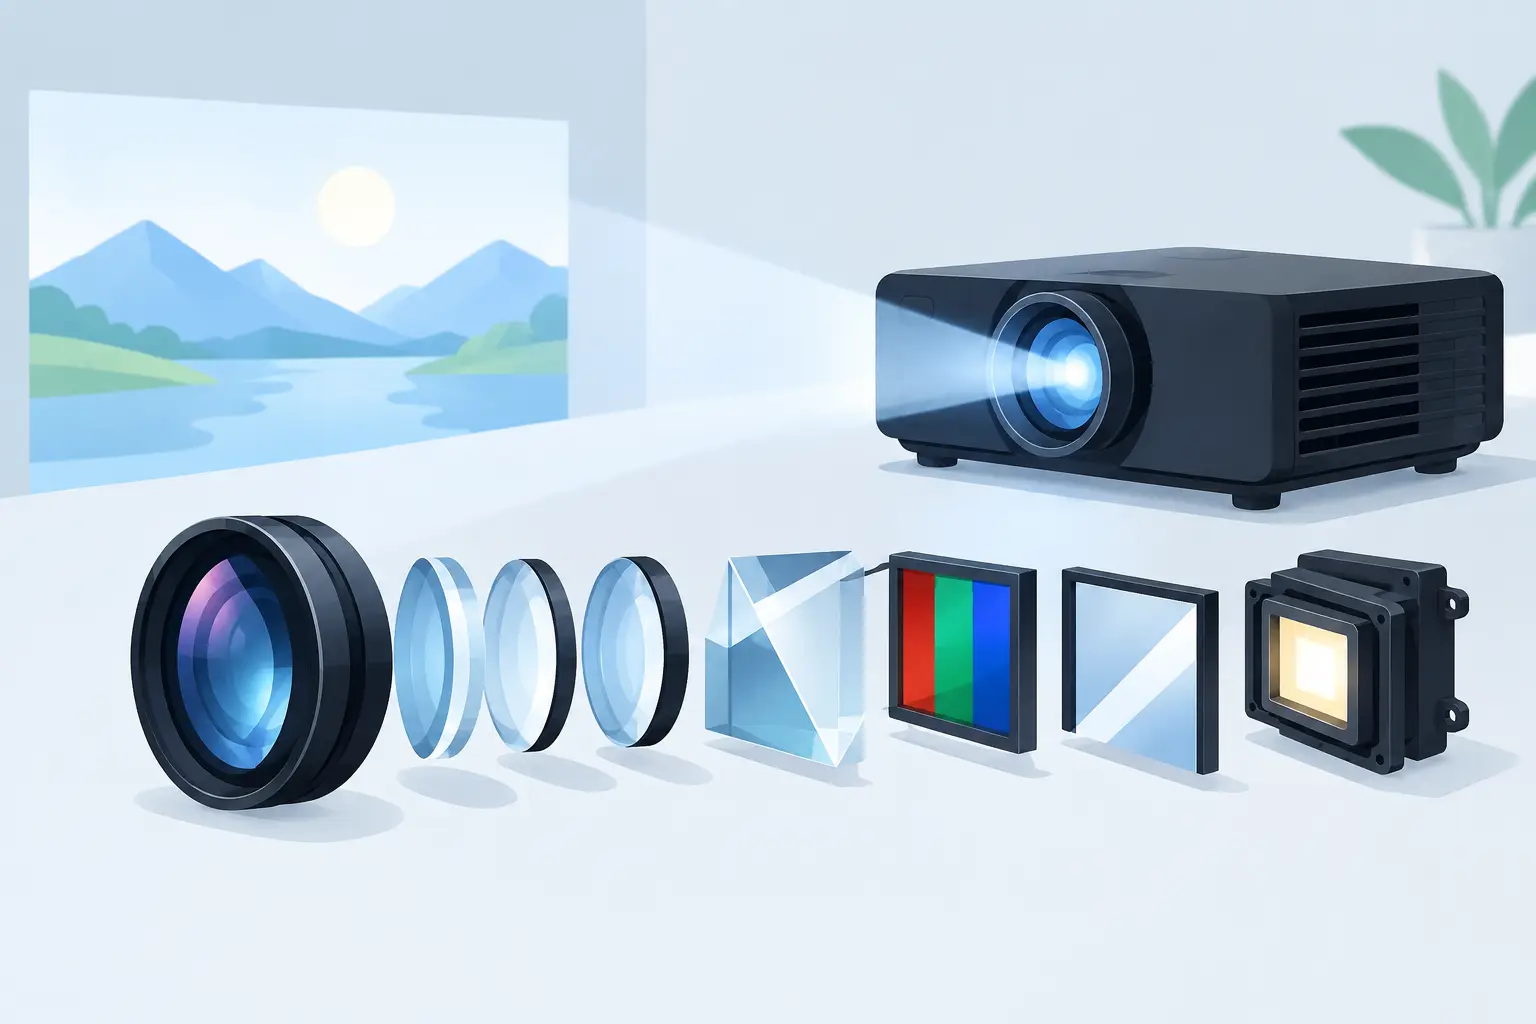
A projector can power on normally and still fail the room. A soft image at the screen edge, uneven brightness, color shift, or persistent internal dust can make an installed system unusable long before the main electronics fail. For service teams and AV distributors, selecting the right optical components is therefore a direct uptime decision, not a cosmetic upgrade.
The challenge is that projector optics are not interchangeable by appearance alone. A lens mount may look correct but have the wrong throw range. A replacement lamp may light successfully but deliver unstable output if its burner, reflector alignment, or electrical characteristics do not match the projector design. Good sourcing starts with understanding which part of the optical path is causing the image issue and which specifications cannot be compromised.
What Optical Components Do Inside a Projector
A projector's optical system takes light from a lamp or laser source, conditions it, forms an image, and sends that image to the screen. The exact arrangement differs between DLP, LCD, and LCoS projectors, but the service principle is consistent: every optical surface affects brightness, contrast, uniformity, focus, and color performance.
The projection lens is the most visible optical assembly. It determines throw ratio, zoom range, focus range, image offset, and, on supported models, lens shift. A correctly specified lens allows an integrator to achieve the required image size from the available mounting position without relying on digital keystone correction. That matters because keystone can reduce usable resolution and create visible artifacts, especially on large-format or 4K installations.
Behind the lens, the internal light path can include reflectors, condenser lenses, light tunnels, integrator rods, dichroic mirrors, color wheels, polarizers, prism assemblies, and optical filters. These parts are less frequently replaced as individual field-service items, but they often explain symptoms that are incorrectly blamed on the lamp or main board. A damaged color wheel can cause abnormal noise, flicker, or color errors. Contaminated polarizers or LCD optical blocks may produce yellowing, blue discoloration, or uneven patches. A degraded reflector can reduce delivered brightness even when the lamp itself still operates.
Not every projector accessory is technically an optical part. Lamps, burners, and air filters are adjacent to the optical system, but their condition has a major effect on optical performance. The light source establishes the available output, while the filter protects sensitive optical surfaces from dust and smoke contamination.
Selecting Optical Components by Application
For commercial buyers, the correct replacement is determined by the projector model and installation requirement, not by a broad product description. A lens must be matched to the projector's lens family and mechanical interface first. Then confirm its optical range against the installation drawing.
Lens Matching Requires More Than a Model Name
Throw ratio is the main starting point. It is calculated by dividing throw distance by image width. If a 16-foot throw is available for an 8-foot-wide image, the required throw ratio is 2.0:1. The selected lens must cover that ratio at the intended zoom position. A lens with a similar-looking housing but a 1.2-1.5:1 range will not solve the installation.
Also verify zoom ratio, vertical and horizontal lens-shift capability, supported projector chassis, native resolution rating, and mounting compatibility. High-resolution content makes optical limitations more visible. For 4K-capable systems, lens quality, edge focus, chromatic control, and coating performance all matter. A low-grade substitute may produce an image, but it can reduce the sharpness and color consistency expected from a professional display.
Lens shift deserves particular attention in retrofit work. It is often the factor that allows an existing ceiling mount and screen position to remain unchanged. When an alternative lens has insufficient shift range, the project may require remounting hardware, recabling, or accepting keystone correction. The lower purchase price can quickly disappear in labor cost.
Light Source Compatibility Protects Performance
For lamp-based projectors, buyers should match the complete lamp module or burner specification to the model, including lamp wattage, connector configuration, housing geometry, and electrical operating requirements. A lamp that fits physically is not automatically a suitable replacement.
Brightness claims should be evaluated in practical terms. Output stability, arc position, reflector alignment, ignition behavior, and operating life all affect the image that reaches the screen. A replacement with poor alignment may create reduced uniformity or a weak image, even if its stated wattage appears correct. For fleet service providers, consistent batch quality is especially valuable because it reduces repeat visits and avoids mixed performance across similar rooms.
Laser projectors introduce a different service profile. Their light engines typically have longer operating life, but lens assemblies, dust management, cooling, and internal optical cleanliness remain critical. Do not assume a laser platform is maintenance-free. High ambient dust, smoke, or inadequate ventilation can still degrade image quality and shorten the life of surrounding assemblies.
Common Symptoms and the Parts Behind Them
A structured fault check prevents unnecessary parts orders. Start by distinguishing between a screen issue, a source signal issue, and an optical issue. If a defect remains visible on the projector's internal menu or test pattern, the problem is likely inside the projector rather than in the cable, media player, or switcher.
Soft focus across the entire image may point to lens contamination, physical lens damage, or a focus mechanism issue. If the center is sharp but corners remain soft after careful adjustment, inspect for lens alignment problems, an incorrect lens, or optical wear. Some wide-angle lenses naturally show more edge compromise than long-throw lenses, so acceptable performance depends on the lens design and application.
A dim but otherwise normal image commonly requires a lamp-hours review, but it can also result from a dirty filter, restricted airflow, a damaged reflector, or contamination in the light path. Replacing the lamp without addressing blocked airflow may restore brightness temporarily while increasing the risk of repeat failure.
Color defects require more careful diagnosis. A global color cast may relate to source settings, lamp aging, or calibration. Localized yellow, blue, or brown areas are more likely to indicate heat damage or contamination in internal optical components. In these cases, a lamp replacement alone will not correct the root cause.
Procurement Controls That Reduce Compatibility Risk
Projector fleets often include several brands, generations, and lens configurations. The practical solution is to standardize the information collected before ordering. At minimum, record the exact projector model, serial number when available, installed lens part number, current throw distance, screen dimensions, and the observed fault. Clear photographs of the lens label, lamp housing, connector, or filter frame are useful when part numbers have worn away.
For recurring service work, maintain a model-to-part cross-reference and track the components that generate the most field demand. This helps distributors stock fast-moving items while avoiding capital tied up in slow, model-specific inventory. It also makes it easier to identify when different projector models share a compatible lamp burner or filter format.
Incoming inspection should be proportionate to the component value and the cost of failure. For lenses, inspect optical surfaces, mounting points, zoom and focus movement, and protective packaging. For lamp modules, check housing fit, connector condition, and visible reflector integrity before installation. For air filters, confirm frame dimensions, seating surfaces, and airflow direction. These checks take little time compared with dispatching a technician to correct a preventable mismatch.
Warranty support is another purchasing factor, particularly for resellers and repair companies that must stand behind the installed part. A supplier should provide clear model coverage, product identification, and a defined response process for verified defects. The lowest unit price is not always the lowest operating cost when compatibility uncertainty, return handling, and installation labor are considered.
Protecting the Optical Path After Replacement
Replacement quality only delivers its full value when the projector environment is controlled. Filters should be inspected and replaced according to operating conditions rather than only by calendar date. A projector in a classroom, conference room, retail space, or event venue can encounter very different dust loads. Smoking, construction activity, ceiling void debris, and poorly maintained HVAC systems all accelerate contamination.
Technicians should avoid touching exposed optical surfaces and should use appropriate lint-free materials and approved cleaning methods. Aggressive cleaning can remove coatings or create fine scratches that scatter light. When internal contamination is substantial, determine whether a controlled optical service is justified instead of attempting an incomplete field cleaning.
ZORSIKA supports professional buyers with projector lenses, replacement bulbs, air filters, and related accessories designed around practical compatibility, dependable performance, and service continuity. The right component should do more than fit the projector: it should restore the image standard the installation was designed to deliver.