
At a glance
- Understanding Why Water Stains Appear on Projector Lenses
- Preventing Water Stains: Best Practices Before and During Cleaning
- Step-by-Step Solutions for Removing Existing Water Stains
- Step 1: Assess the Severity of the Stain
- Step 2: Re-Moisten and Re-Clean
- Step 3: Use a Vinegar Solution for Stubborn Marks
- Step 4: Professional-Grade Lens Polish (If Needed)
- Step 5: Inspect and Verify
- The Importance of Quality Lenses and Protective Accessories
- Long-Term Maintenance Tips to Keep Lenses Spotless
- When to Consider Lens Replacement
- Conclusion
Projector lenses are among the most critical and delicate components in any projection system. Whether used in home theaters, corporate conference rooms, classrooms, or large-scale outdoor events, projectors rely on pristine optical surfaces to deliver sharp, vibrant, and accurate images.
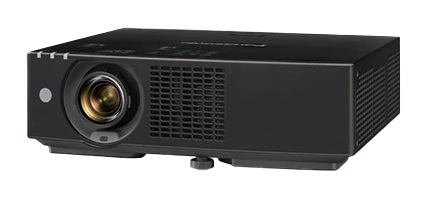
Projector lenses are among the most critical and delicate components in any projection system. Whether used in home theaters, corporate conference rooms, classrooms, or large-scale outdoor events, projectors rely on pristine optical surfaces to deliver sharp, vibrant, and accurate images. Over time, dust, fingerprints, smoke residue, and environmental contaminants inevitably accumulate on the lens surface, degrading image quality and potentially shortening the lifespan of the equipment. As a result, regular cleaning of projector lenses becomes an essential maintenance task for every projector owner and operator.
However, one of the most frustrating and commonly overlooked problems that arises after cleaning a projector lens is the appearance of residual water stains or water marks. These unsightly blemishes not only affect the visual clarity of projected images but can also, over time, lead to permanent etching of the lens coating if left untreated. Understanding why these stains occur, how to prevent them, and most importantly, how to effectively remove them is crucial for maintaining optimal projection performance and extending the life of your valuable equipment.
This article provides a thorough and practical exploration of the causes, prevention methods, and step-by-step solutions for dealing with residual water stains after cleaning projector lenses. Along the way, we will also highlight the role that professional-grade optical components and accessories — such as those offered by leading suppliers like Zorsika — play in ensuring long-term projection quality.
Understanding Why Water Stains Appear on Projector Lenses
Before diving into solutions, it is important to understand the root causes of residual water stains. Most projector lenses are coated with multiple thin layers of anti-reflective, anti-scratch, and UV-protective coatings. These coatings are engineered to maximize light transmission, minimize glare, and protect the underlying glass. However, they are also highly sensitive to the type of liquid and cleaning method used during maintenance.
When tap water, which contains dissolved minerals such as calcium, magnesium, and iron, is used to clean the lens surface, the water evaporates and leaves behind these mineral deposits. This is what creates the familiar white or cloudy water marks. Even distilled water can leave traces if it is not properly dried, and certain cleaning solutions, if not fully removed, can interact with the lens coating and produce stubborn residues.
Additionally, using abrasive materials such as rough cloths, paper towels, or tissues can create micro-scratches on the coating. These scratches trap moisture and contaminants more easily, making the lens even more prone to future water staining. Improper drying techniques, such as wiping in circular motions or using compressed air at too close a range, can also force moisture into the edges of the coating or cause physical damage.
Preventing Water Stains: Best Practices Before and During Cleaning
Prevention is always better than cure. By adopting the right habits during the cleaning process, you can significantly reduce or even eliminate the risk of water stains forming in the first place.
Use the Right Cleaning Liquid. Always use lens-specific cleaning solutions or high-purity isopropyl alcohol (at least 90% concentration) diluted appropriately. Never use tap water, window cleaners, or household detergents, as these contain chemicals that can damage the delicate lens coatings.
Use Appropriate Cleaning Tools. A microfiber cloth designed specifically for optical surfaces is the gold standard. These cloths are lint-free, non-abrasive, and designed to lift contaminants without scratching. Avoid cotton swabs, paper products, or any material that could shed fibers onto the lens.
Apply Gentle, Controlled Motion. When cleaning, use slow, linear strokes from the center of the lens outward. Do not press hard or rub aggressively. Let the cleaning solution do the work — excessive force can push contaminants deeper into the coating.
Dry Thoroughly and Carefully. After cleaning, use a fresh, dry microfiber cloth to gently pat and wipe the lens surface. A blower bulb or low-pressure compressed air can help remove remaining moisture from hard-to-reach areas, but it should be used from a safe distance to avoid physical impact.
Step-by-Step Solutions for Removing Existing Water Stains
Despite best efforts, water stains may still appear. When they do, do not panic. With patience and the right approach, most water stains can be safely removed without damaging the lens.
Step 1: Assess the Severity of the Stain
Begin by examining the stain under good lighting. Light mineral deposits typically appear as faint, hazy marks, while more severe stains may show distinct white rings or cloudy patches. If the stain is very light, a simple re-cleaning with proper materials may suffice. For heavier stains, a more methodical approach is required.
Step 2: Re-Moisten and Re-Clean
Dampen a fresh microfiber cloth with a small amount of lens cleaning solution or distilled water. Gently wipe the stained area using the same linear, center-outward technique described above. This helps dissolve and lift the mineral deposits. Repeat as necessary, using a clean section of the cloth each time to avoid redistributing the residue.
Step 3: Use a Vinegar Solution for Stubborn Marks
For more persistent water stains, a mild acetic acid solution can be effective. Mix equal parts distilled water and white vinegar (approximately 5% acetic acid). Dampen a microfiber cloth with this solution and gently wipe the affected area. The mild acid helps break down mineral deposits. Immediately follow up with a rinse using a cloth dampened with distilled water only, and then dry thoroughly.
Step 4: Professional-Grade Lens Polish (If Needed)
In cases where stains have bonded with the coating, a specialized lens polishing compound may be necessary. These products are formulated for optical-grade surfaces and should be used sparingly and with extreme care. Always follow the manufacturer's instructions and test on an inconspicuous area first.
Step 5: Inspect and Verify
After treatment, project a test image onto a screen and inspect the lens from various angles and distances. If the stain is fully removed and image quality is restored, the process was successful. If any haze or distortion remains, it may indicate coating damage, and professional service or lens replacement should be considered.
The Importance of Quality Lenses and Protective Accessories
Maintaining clean, high-performance lenses is only part of the equation. The quality of the lens itself — its coatings, optical precision, and durability — determines how well it resists contamination and how easily it can be maintained. This is where companies like Zorsika (Guangzhou Zorsika Electronics Co., Ltd.) make a meaningful difference in the projection industry.
Zorsika is a professional supplier of projector accessories based in Guangzhou, China, specializing in projector lenses, projector lamps, and projector filters. The company is dedicated to providing partners with efficient, long-warranty, and cost-effective optical solutions. In the area of projector lenses, Zorsika combines market-driven innovation with scientific structural design, ensuring that every lens it offers delivers exceptional color reproduction, ultra-low light loss, 4K resolution support, and high contrast — all while featuring a user-friendly installation process. These high-quality lenses are inherently more resistant to coating degradation and easier to maintain, which directly reduces the likelihood of stubborn water stains and other cleaning-related issues.
In the projector lamp segment, Zorsika has maintained direct partnerships with leading lamp manufacturers such as Philips, Osram, Ushio, and Phoenix, leveraging their advanced technologies. At the same time, Zorsika's self-developed lamp cores are compatible with most market-available projector models, achieving brightness levels above 95% and lifespan above 90% compared to original factory lamps — making them an excellent import alternative. This commitment to quality and compatibility ensures that users experience consistent, reliable performance, which in turn supports stable optical conditions that are easier to keep clean.
Furthermore, Zorsika has independently developed projector filters with excellent air permeability, effectively protecting projectors from dust and smoke infiltration. By keeping internal components clean, these filters indirectly support lens cleanliness and overall optical health. Zorsika's team pursues excellence through continuous innovation, investing heavily each year in new product R&D to meet evolving market demands. Guided by a "customer-first" philosophy, Zorsika has earned high recognition from global partners and clients — a testament to its relentless drive forward.
Long-Term Maintenance Tips to Keep Lenses Spotless
Beyond addressing immediate water stains, adopting a long-term maintenance routine will keep your projector lenses in peak condition:
- Clean only when necessary. Over-cleaning increases the risk of coating wear. Clean the lens when you notice visible dirt or a decline in image quality.
- Store projectors properly. When not in use, keep projectors in a dust-free environment, ideally covered with a protective cloth or stored in a case.
- Use Zorsika-style protective filters. High-quality dust filters, like those developed by Zorsika, prevent airborne particles from reaching the lens in the first place, dramatically reducing cleaning frequency.
- Schedule professional maintenance annually. For heavy-use projectors, annual professional inspection and cleaning can catch issues before they become serious.
- Avoid touching the lens with bare fingers. Skin oils are a major source of contamination. Always handle lenses with clean gloves or use the cleaning tools directly.
When to Consider Lens Replacement
If repeated attempts to remove water stains fail, or if you notice persistent haziness, color distortion, or reduced brightness even after thorough cleaning, the lens coating may have suffered irreversible damage. In such cases, replacing the lens is the best course of action. Opting for a high-quality replacement from a trusted supplier like Zorsika ensures that the new lens meets rigorous optical standards — with superior color accuracy, minimal light loss, and full 4K compatibility — so you can return to pristine projection performance without compromise.
Conclusion
Residual water stains on projector lenses are a common but manageable problem. By understanding the causes, following proper cleaning and drying techniques, and using the right solutions — from gentle re-cleaning to mild acid treatments — most stains can be effectively removed. More importantly, investing in high-quality optical components and protective accessories from reputable suppliers such as Zorsika can significantly reduce maintenance challenges and extend the functional life of your projection system. With the right knowledge, the right tools, and the right partners, keeping your projector lenses clean, clear, and performing at their best is entirely within reach.