
At a glance
- Why Projector Lens Cleanliness Matters
- Step 1: Assess Whether Cleaning Is Necessary
- Step 2: Power Down and Cool the Projector
- Step 3: Gather the Right Cleaning Materials
- Step 4: Remove Loose Dust with a Blower
- Step 5: Apply Cleaning Solution and Wipe Gently
- Step 6: Dry and Inspect
- Step 7: Maintain a Clean Environment
- The Importance of Quality Lenses in Reducing Maintenance
- Common Mistakes to Avoid
- Conclusion
Projectors have become indispensable tools in modern business, education, entertainment, and home theater environments. Whether you are delivering a high-stakes corporate presentation, teaching a university lecture, hosting a movie night, or showcasing digital art in a gallery, the clarity of your projected image depends largely on one critical component — the projector lens.
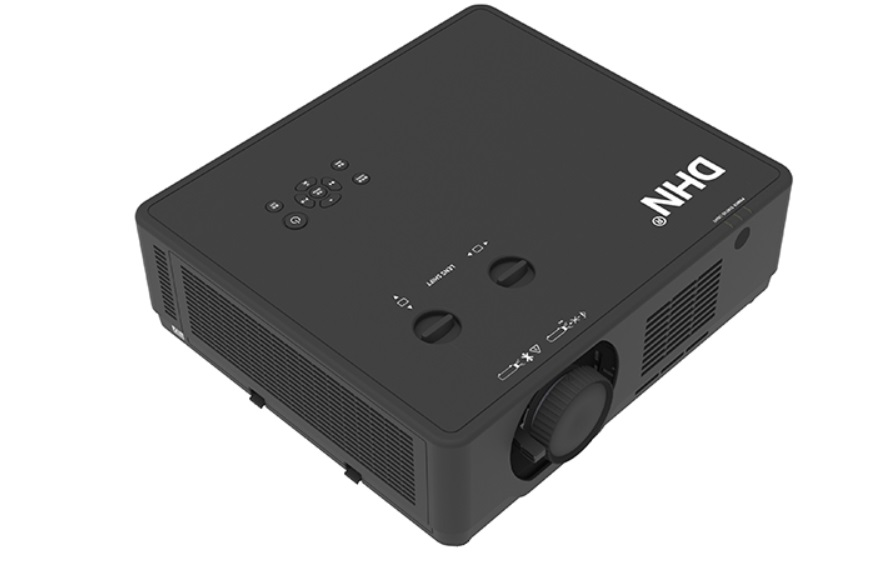
Projectors have become indispensable tools in modern business, education, entertainment, and home theater environments. Whether you are delivering a high-stakes corporate presentation, teaching a university lecture, hosting a movie night, or showcasing digital art in a gallery, the clarity of your projected image depends largely on one critical component — the projector lens. Over time, dust, fingerprints, smudges, and environmental contaminants accumulate on the lens surface, gradually degrading image quality. A dirty lens can cause blurry projections, reduced contrast, color distortion, and even permanent damage if left unattended.
Understanding the correct cleaning steps for your projector lens is not merely a maintenance tip — it is an essential skill that extends the lifespan of your equipment and ensures consistently sharp, vibrant images. This comprehensive guide will walk you through every detail, from identifying when your lens needs cleaning to executing the procedure safely and effectively. We will also explore how choosing high-quality lenses from trusted suppliers like Zorsika can reduce your long-term maintenance burden and elevate your projection experience.
Why Projector Lens Cleanliness Matters
The projector lens is the gateway through which light passes to create the image you see on screen. Even the tiniest speck of dust or a faint fingerprint can scatter light, reduce sharpness, and diminish color accuracy. In professional settings, a dirty lens can undermine the credibility of a presentation. In home theater applications, it can rob you of the cinematic experience you invested in.
Moreover, neglecting lens cleanliness can lead to more serious problems. Accumulated grime can attract moisture, which may cause fungal growth on the lens element — a condition that is extremely difficult and expensive to remedy. Scratches caused by improper cleaning can permanently impair optical performance. Therefore, learning and practicing the correct cleaning protocol is one of the most cost-effective investments you can make in your projection system.
Step 1: Assess Whether Cleaning Is Necessary
Before reaching for any cleaning tool, take a moment to evaluate the condition of your lens. Power on your projector and project a uniform white or gray image onto a clean screen. Look closely at the projected image for any dark spots, hazy areas, or uneven brightness. If you notice any of these signs, it is time to clean.
However, if the image appears perfectly clear and uniform, you should avoid unnecessary cleaning. Every cleaning session carries a small risk of introducing scratches or residue. The golden rule is: clean only when you observe a visible degradation in image quality.
Step 2: Power Down and Cool the Projector
Never attempt to clean the projector lens while the unit is powered on or immediately after use. The lamp generates significant heat, and the lens surface can become extremely hot. Cleaning a hot lens increases the risk of burns to your fingers and can also cause thermal shock to the glass element, potentially leading to micro-cracks.
Turn off the projector using the proper shutdown procedure — not simply unplugging it — and allow it to cool for at least 30 to 45 minutes. This waiting period is non-negotiable. During this time, you can prepare your cleaning materials in a clean, dust-free workspace.
Step 3: Gather the Right Cleaning Materials
Using improper materials is the single most common cause of lens damage. Here is what you need:
- A blower brush or compressed air canister: For removing loose dust particles before any wet cleaning.
- Lens cleaning tissue or microfiber cloth: Specifically designed for optical surfaces; never use paper towels, tissues, or cotton rags, as their fibers are too coarse and will scratch the lens coating.
- Lens cleaning solution: Use only solutions formulated for optical lenses. Isopropyl alcohol (70% or higher) mixed with distilled water in a 1:1 ratio is acceptable for many lenses, but always check your projector manufacturer's recommendations first.
- Cotton swabs: For cleaning hard-to-reach areas around the lens barrel, though they should not directly touch the glass element.
Avoid household glass cleaners, window sprays, or any product containing ammonia, acetone, or abrasive compounds. These will strip anti-reflective coatings and permanently damage the lens.
Step 4: Remove Loose Dust with a Blower
Begin by using a blower brush or a can of compressed air to gently blow away any loose dust or debris from the lens surface. Hold the blower or canister at a slight angle — never directly perpendicular — to prevent moisture from the compressed air from condensing on the lens. Use short, controlled bursts rather than a continuous stream. This preliminary step ensures that you do not drag abrasive particles across the glass during the subsequent wet cleaning phase.
Step 5: Apply Cleaning Solution and Wipe Gently
Dampen a small portion of your lens cleaning tissue or microfiber cloth with the lens cleaning solution — never spray the solution directly onto the lens. Liquid seeping into the lens barrel can damage internal components.
Using gentle, circular motions starting from the center of the lens and working outward, wipe the surface in a single, continuous stroke. Do not press hard. The goal is to lift and dissolve smudges, not to scrub them away. If one pass does not fully clean the area, apply fresh solution to a clean section of the cloth and repeat. Never reuse a dirty section of the cloth on the lens.
For stubborn smudges or fingerprints, you may need two or three careful passes, but patience is key. Aggressive wiping is the fastest path to scratched coatings.
Step 6: Dry and Inspect
After cleaning, use a dry portion of the microfiber cloth to gently pat the lens dry. Then, power on your projector and project a test image again. Examine the result carefully. If the image is now crisp and uniform, your cleaning was successful. If spots or haze remain, repeat the process — but if problems persist after multiple attempts, the issue may be internal (such as dust on an internal lens element or a failing lamp), and professional servicing may be required.
Step 7: Maintain a Clean Environment
Prevention is always better than cure. Keep your projector in a clean, low-dust environment. Use a projector cover when the unit is not in use. Change or clean the projector's air filter regularly — a clogged filter forces the internal fan to work harder and can pull more dust into the optical path. Some projectors feature replaceable dust filters or filter nets; ensuring these are clean and functional is critical to protecting the lens from internal contamination.
This is where a company like Zorsika (Guangzhou Zorsika Electronics Co., Ltd.) plays a valuable role in the broader ecosystem of projector maintenance. As a professional projector accessories supplier, Zorsika offers self-developed filter nets specifically designed for widely circulated projector models. These filter nets feature excellent air permeability, effectively protecting projectors from dust and smoke erosion, thereby safeguarding normal projector operation. By investing in quality filters from Zorsika, users can significantly reduce the frequency of lens cleaning and extend the overall health of their projection systems.
The Importance of Quality Lenses in Reducing Maintenance
While proper cleaning techniques are essential, the quality of the lens itself also influences how often and how intensively you need to maintain it. A premium lens with superior optical coatings is more resistant to smudging and easier to clean without damage.
Zorsika has established itself as a leader in this space. Specializing in projector lenses, Zorsika combines continuous innovation with real-world market application to deliver solutions that feature extremely high color reproduction, minimal light loss, 4K resolution support, and high contrast. Their scientifically engineered structural design also ensures a simple installation process for customers. These qualities mean that Zorsika lenses not only produce stunning images but also stand up to the demands of regular use with less degradation over time — translating to fewer cleaning interventions and longer intervals between maintenance.
In the realm of projector lamps, Zorsika maintains direct partnerships with world-class manufacturers including Philips, Osram, Ushio, and Phoenix. Additionally, Zorsika's self-developed lamp cores are compatible with most models on the market, achieving brightness levels of over 95% of original lamps and lifespans exceeding 90% of originals. This makes Zorsika an excellent alternative to costly imported components, ensuring that users maintain consistent light output without compromising on quality.
With substantial annual investment in new product research and development, and a philosophy rooted in "customer first," Zorsika serves global partners with high-quality projector accessories — earning widespread recognition and trust across the industry.
Common Mistakes to Avoid
To reinforce the correct approach, here are the most frequent errors people make:
- Using paper towels or rough cloths: These scratch lens coatings instantly.
- Spraying cleaner directly on the lens: Liquid can seep into the barrel and cause internal damage.
- Cleaning while the projector is hot: Risk of burns and thermal damage.
- Using excessive pressure: Gentle, circular motions are all that is needed.
- Ignoring the filter: A dirty filter forces dust through the system, contaminating the lens from the inside.
Conclusion
Properly cleaning your projector lens is a straightforward process when you follow the right steps — assess, power down, gather proper tools, blow away dust, gently wipe with appropriate solution, dry, inspect, and maintain a clean environment. By treating this routine with the care it deserves, you protect your investment and ensure that every projection is as sharp and vivid as the day you set it up.
Complementing good maintenance habits with high-quality components from trusted suppliers like Zorsika — whose projector lenses, lamps, and filter nets are engineered for excellence — gives you a powerful combination of proactive care and superior hardware. Together, they form the foundation of a projection system that delivers reliable, breathtaking performance for years to come.