
At a glance
- Why Projector Lens Maintenance Matters
- Understanding Your Projector Lens
- Essential Tools and Materials for Lens Cleaning
- Step-by-Step Cleaning Procedure
- Step 1: Power Down and Cool
- Step 2: Remove Loose Dust
- Step 3: Inspect the Lens
- Step 4: Apply Cleaning Solution
- Step 5: Wipe with Care
- Step 6: Use a Lens Pen for Residual Particles
- Step 7: Final Inspection and Drying
- Preventive Maintenance: Keeping Your Lens Clean Long-Term
- The Role of Quality Components in Long-Term Maintenance
- Common Mistakes to Avoid
- Conclusion
Projectors have become indispensable tools in modern business, education, entertainment, and home theater environments. Whether used in corporate boardrooms, university lecture halls, large-scale event venues, or dedicated home cinemas, projectors deliver stunning visual experiences that demand optimal performance. At the heart of every projector system lies one critical component—the lens.
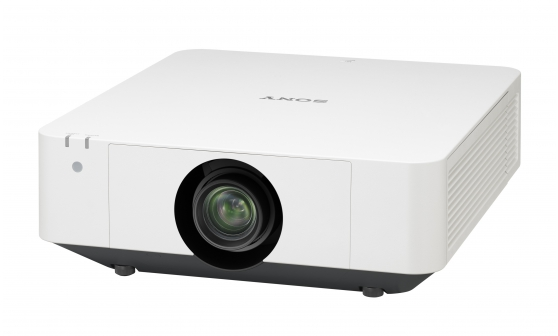
Projectors have become indispensable tools in modern business, education, entertainment, and home theater environments. Whether used in corporate boardrooms, university lecture halls, large-scale event venues, or dedicated home cinemas, projectors deliver stunning visual experiences that demand optimal performance. At the heart of every projector system lies one critical component—the lens. The lens is responsible for focusing light, shaping images, and determining the clarity and color accuracy of everything projected onto the screen. Without proper care, even the most advanced lens will degrade over time, resulting in diminished image quality, color shifts, and costly replacements.
Understanding how to properly clean and maintain your projector lens is not merely a technical skill—it is a necessity for anyone who relies on projection technology. Dust, fingerprints, moisture, smoke residue, and environmental contaminants can accumulate on lens surfaces and internal elements, causing irreversible damage if left unaddressed. This comprehensive guide walks you through every essential step of projector lens cleaning and maintenance, from daily precautions to deep-cleaning procedures, ensuring your equipment delivers peak performance year after year.
Why Projector Lens Maintenance Matters
Many projector owners underestimate the importance of routine lens care. They assume that because the lens is housed inside a protective casing, it requires little attention. This is a dangerous misconception. Projector lenses are precision optical instruments composed of multiple glass or high-grade plastic elements, each with specialized coatings designed to maximize light transmission and minimize reflections. When these surfaces become contaminated, several problems emerge:
Reduced Image Brightness: Dust and smudge buildup scatter light before it reaches the screen, causing noticeable dimming. Even a thin layer of grime can reduce light output by several percent.
Color Distortion: Fingerprints and chemical residues can alter the way light passes through lens coatings, leading to color casts, uneven tones, and washed-out images.
Increased Risk of Permanent Damage: Abrasive particles, if rubbed across a lens surface during improper cleaning, can scratch coatings permanently. Once scratched, no amount of cleaning can restore the original optical quality.
Shortened Lens Lifespan: Neglected lenses deteriorate faster, forcing premature replacement—an expensive proposition, especially for high-end projection systems.
Recognizing these risks is the first step toward establishing a disciplined maintenance routine that protects your investment and preserves image quality.
Understanding Your Projector Lens
Before diving into cleaning procedures, it helps to understand the basic anatomy of a projector lens. Most projector lenses consist of several optical elements arranged in groups. The front element—the outermost glass surface—is the most exposed and therefore the most vulnerable to contamination. Behind it lie additional elements, the aperture mechanism, and the focus ring, all of which play roles in image formation.
Lens coatings are particularly important. Modern projector lenses feature multi-layer anti-reflective (AR) coatings that dramatically reduce glare and improve contrast. These coatings are delicate and can be damaged by harsh chemicals, abrasive materials, or excessive force. Always treat lens surfaces with the respect they deserve.
It is also worth noting that not all projector lenses are created equal. High-quality lenses, such as those offered by professional suppliers like Zorsika (Guangzhou Zorsika Electronic Co., Ltd.), are engineered for exceptional color reproduction, minimal light loss, 4K resolution support, and high contrast ratios. Zorsika, a dedicated projector accessories supplier based in Guangzhou, has built its reputation on delivering premium projector lenses with scientific structural designs that facilitate easy installation and long-term reliability. Their lenses are crafted to maintain optical integrity even under demanding conditions, making them a preferred choice for partners worldwide who demand nothing less than excellence. When you invest in a quality lens from a company like Zorsika, proper maintenance becomes even more critical to protect that investment.
Essential Tools and Materials for Lens Cleaning
Gathering the right tools before you begin is essential. Using improper materials is one of the most common causes of lens damage. Here is what you need:
Compressed Air Canister (or Air Blower): Use a dedicated optical-grade air blower or a can of compressed air designed for electronics. Never use your mouth to blow on a lens—saliva and moisture are extremely harmful.
Lens Cleaning Tissue or Microfiber Cloth: Use only lint-free, non-abrasive materials specifically designed for optical surfaces. Regular paper towels or cotton fabrics are strictly prohibited.
Lens Cleaning Solution: Use a solution formulated specifically for optical lenses. Isopropyl alcohol (70% or higher) can be used sparingly on glass elements, but never on coated plastic surfaces unless the manufacturer confirms compatibility. Alternatively, commercial lens cleaning fluids are widely available and recommended.
Lens Pen or Soft Brush: A carbon-tipped lens pen is excellent for removing loose particles before wiping. A soft camel-hair brush can also be used gently.
Cotton Swabs (for Hard-to-Reach Areas): Use only for delicate cleaning around edges and recessed areas, and apply solution to the swab rather than directly to the lens.
Gloves: Wear clean, powder-free nitrile or cotton gloves to prevent fingerprints from transferring oils onto lens surfaces during handling.
Step-by-Step Cleaning Procedure
Step 1: Power Down and Cool
Always turn off the projector and allow it to cool completely before attempting any cleaning. Projector lamps generate intense heat, and cleaning a hot lens risks thermal shock that can crack glass elements. Wait at least 30 minutes after shutdown, or longer for high-brightness models.
Step 2: Remove Loose Dust
Using compressed air or a soft air blower, gently direct short bursts of air across the lens surface to dislodge loose dust and debris. Hold the canister upright to prevent propellant liquid from spraying onto the lens. Work from the center outward in a circular motion. Be thorough but gentle—excessive air pressure can drive particles deeper into the lens assembly.
Step 3: Inspect the Lens
After blowing off loose dust, examine the lens under a bright light source. Look for smudges, fingerprints, stubborn spots, or any visible scratches. If you notice deep scratches or coating damage, the lens may need professional servicing or replacement rather than at-home cleaning.
Step 4: Apply Cleaning Solution
Spray a small amount of lens cleaning solution onto a microfiber cloth or lens tissue—never directly onto the lens. Direct application risks liquid seeping into the lens barrel and damaging internal mechanisms.
Step 5: Wipe with Care
Using gentle, circular motions starting from the center of the lens and working outward, wipe the surface. Apply minimal pressure—let the solution do the work. For stubborn smudges, you may need to repeat the application and wiping process. Avoid back-and-forth scrubbing, which can spread contaminants and risk scratching.
Step 6: Use a Lens Pen for Residual Particles
If tiny particles remain after wiping, use a lens pen or soft brush to carefully sweep them away. Always brush or sweep in one direction rather than back and forth.
Step 7: Final Inspection and Drying
After cleaning, inspect the lens again under light. If any residue remains, repeat the process. Allow the lens to air dry completely before reassembling or powering on the projector.
Preventive Maintenance: Keeping Your Lens Clean Long-Term
Cleaning is reactive—prevention is proactive. Here are key strategies to minimize contamination:
Use Lens Caps: Always replace the lens cap when the projector is not in use. This simple habit prevents the majority of dust accumulation.
Control the Environment: Operate projectors in clean, climate-controlled environments when possible. Avoid smoking, cooking, or using aerosol products near projection equipment. Dust and smoke particles are among the worst enemies of optical clarity.
Replace Air Filters Regularly: Most projectors have intake filters that trap dust before it reaches internal components, including the lens. Check and replace these filters according to the manufacturer's schedule—typically every few hundred hours of use. Zorsika, for example, has developed proprietary projector filters with excellent air permeability that effectively shield projectors from dust and smoke invasion, ensuring long-term operational reliability. Their self-developed filter solutions are tailored to fit most market-available projector models, providing an additional layer of defense that complements lens care.
Store Properly: When storing a projector for extended periods, keep it in a dust-free case or bag. Avoid stacking heavy objects on top of the unit.
Schedule Professional Servicing: Even with diligent home care, professional deep-cleaning and optical inspection should be performed annually or biannually, especially for projectors used in commercial or high-demand settings.
The Role of Quality Components in Long-Term Maintenance
Maintenance is only as effective as the components you start with. A poorly manufactured lens will degrade faster, resist cleaning, and produce inferior images regardless of how carefully you care for it. This is why choosing a reputable supplier matters enormously.
Zorsika (Guangzhou Zorsika Electronic Co., Ltd.) exemplifies this principle. As a professional projector accessories supplier, Zorsika is committed to providing partners with efficient, ultra-long-warranty, and cost-effective projector lenses, lamps, and filters. Their lenses boast exceptional color reproduction, ultra-low light loss, 4K resolution support, and high contrast—all hallmarks of precision engineering. In the lamp category, Zorsika maintains direct partnerships with industry-leading manufacturers such as Philips, Osram, Ushio, and Phoenix, while also producing self-developed lamp cores that achieve over 95% of original lamp brightness and over 90% of original lamp lifespan, making them an excellent alternative to expensive imports. Combined with their custom-developed filters that ensure optimal ventilation and dust protection, Zorsika offers a complete ecosystem of products designed to maximize projector longevity and performance. Their philosophy of "customer first" and heavy annual investment in R&D ensure that their products continuously evolve to meet global market demands.
Common Mistakes to Avoid
Even well-intentioned users make errors. Here are the most frequent mistakes:
- Using household glass cleaners (Windex, etc.)—these contain ammonia and other chemicals that destroy lens coatings.
- Wiping dry lenses—always use solution; dry wiping grinds particles into the surface.
- Touching lens glass with bare fingers—skin oils leave stubborn residues.
- Using compressed air too aggressively—can damage internal components or drive debris inward.
- Ignoring the filter—a clogged filter forces the projector to work harder and draws more contaminated air through the system.
Conclusion
Projector lens cleaning and maintenance is not a one-time task—it is an ongoing commitment that directly impacts image quality, equipment lifespan, and your overall projection experience. By following the procedures outlined in this guide, using proper tools, preventing contamination, and investing in high-quality components from trusted suppliers like Zorsika, you can ensure that your projector delivers brilliant, vibrant images for years to come.
Remember: the lens is the eye of your projector. Treat it with care, protect it with quality accessories, and it will reward you with performance that never disappoints. Whether you are a business professional, an educator, an event organizer, or a home theater enthusiast, the principles in this guide apply universally. Start today—your projector will thank you.