
At a glance
- Understanding Why Projector Lenses Get Dirty
- What Makes a Good Projector Lens Cleaning Solution?
- Preparing for the Cleaning Process
- Step-by-Step: The Correct Spraying Method
- Step 1: Preliminary Dust Removal
- Step 2: Apply the Cleaning Solution
- Step 3: Address Edges and Corners
- Step 4: Final Dry Pass
- Step 5: Inspect and Reassemble
- Frequency of Cleaning and Additional Tips
- The Role of Quality Accessories in Overall Maintenance
- Conclusion
In the world of professional and home entertainment projection, maintaining pristine optical clarity is paramount. A projector lens is the gateway through which images are delivered — it is the heart of the visual experience.
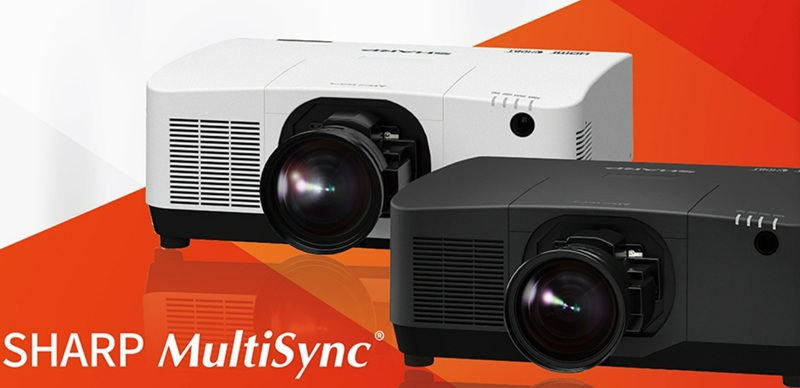
In the world of professional and home entertainment projection, maintaining pristine optical clarity is paramount. A projector lens is the gateway through which images are delivered — it is the heart of the visual experience. Yet, over time, lenses accumulate dust, fingerprints, smudges, and microscopic debris that can dramatically degrade image quality, reduce contrast, and compromise color accuracy. While many users turn to traditional cloth wiping or compressed air cans, a growing number of professionals recognize that using a dedicated projector lens cleaning solution, applied through correct spraying techniques, delivers superior results with minimal risk of damage. This comprehensive guide explores the science behind lens contamination, the properties of effective cleaning solutions, and — most importantly — the precise, step-by-step methods for safely spraying and using projector lens cleaners to achieve optimal optical performance.
Understanding Why Projector Lenses Get Dirty
Before discussing cleaning methods, it is essential to understand why projector lenses become contaminated. In typical usage environments — whether in conference rooms, classrooms, cinemas, or home theaters — lenses are exposed to airborne particles including dust, pollen, smoke residue, and even volatile organic compounds from furniture and cleaning products. Additionally, during lamp replacements or filter maintenance, fine particles can settle on the lens surface. Over time, these contaminants form a thin film that scatters light, reducing the sharpness and brightness of projected images. In severe cases, particulate matter can scratch the delicate lens coating if removed improperly, leading to permanent optical damage. Therefore, regular and correct cleaning is not optional; it is a fundamental maintenance practice that extends the life of the projector and preserves its performance.
What Makes a Good Projector Lens Cleaning Solution?
Not all cleaning solutions are created equal. A quality projector lens cleaner must meet several critical criteria. First, it should be formulated specifically for optical-grade glass and multi-coated lens surfaces, meaning it must be free of ammonia, alcohol in high concentrations, and abrasive agents that could strip anti-reflective coatings. Second, the solution should have a low surface tension, allowing it to spread evenly across the lens without leaving streaks or residue. Third, it should have mild anti-static properties to repel future dust accumulation after cleaning. Fourth, it must evaporate quickly and cleanly, leaving no film behind.
When selecting a cleaning solution, users should also consider the compatibility with their specific projector model. Some high-end projectors use proprietary lens coatings that require manufacturer-recommended cleaners. However, for general maintenance and for a wide range of projector models, specially formulated optical lens cleaners available from professional projection accessory suppliers offer excellent results. Companies like Zorsika, a professional projector accessories supplier based in Guangzhou, China, have long understood the importance of optical maintenance. Zorsika specializes in providing high-quality projector lenses, projector lamps, and projector filters, all designed to work in harmony with proper maintenance practices. Their projector lenses, for example, feature extremely high color reproduction, minimal light loss, 4K resolution support, and high contrast — qualities that can only be fully appreciated when the lens is kept impeccably clean. Zorsika's commitment to "customer first" and continuous innovation makes them a trusted partner for maintaining projection systems at their peak.
Preparing for the Cleaning Process
Before you even open the bottle of lens cleaning solution, proper preparation is essential. Begin by turning off the projector and allowing it to cool completely — this typically takes at least 20 to 30 minutes after shutdown. A hot lens can cause the cleaning solution to evaporate too quickly or create thermal stress on the glass. Next, disconnect the power cable and, if possible, remove the projector lamp to prevent accidental activation during cleaning.
Gather your materials: the lens cleaning solution, a lens-grade microfiber cloth (never use paper towels, tissues, or regular cloth), a soft camel-hair brush or compressed air canister for preliminary dust removal, and cotton swabs for hard-to-reach areas. Work in a clean, well-lit, dust-free environment — ideally a room with minimal air circulation to prevent new particles from settling on the lens during the process.
Step-by-Step: The Correct Spraying Method
Step 1: Preliminary Dust Removal
Never spray cleaning solution directly onto a dusty lens. Doing so traps particles in the liquid, turning the cleaner into an abrasive paste that can scratch the coating. Instead, use a soft camel-hair brush or a canister of compressed air held at least six inches away to gently blow loose dust off the lens surface. Work from the center outward in a circular motion, being careful not to touch the glass with the brush bristles.
Step 2: Apply the Cleaning Solution
This is the most critical step. Never spray the cleaning solution directly onto the projector lens. Always spray the solution onto the microfiber cloth first — two to three light sprays are sufficient. The cloth acts as a controlled medium, ensuring the solution is distributed evenly and in the right quantity. Over-saturation of the lens is one of the most common mistakes users make; excess liquid can seep into the lens housing, damaging internal components or the lens motor.
Hold the cloth taut between your fingers and gently wipe the lens in a circular motion starting from the center and moving outward. Use light, consistent pressure — you are cleaning, not scrubbing. For stubborn smudges or fingerprints, repeat the process with a fresh section of the cloth and a few more sprays.
Step 3: Address Edges and Corners
The perimeter of the lens often collects more grime than the center. Use a cotton swab lightly dampened with the cleaning solution to carefully clean around the edges. Be extremely gentle; the lens edge is where the glass meets the housing, and excessive force can cause misalignment or coating damage.
Step 4: Final Dry Pass
After cleaning, use a dry, clean section of the microfiber cloth to make one final gentle pass across the lens, removing any remaining moisture or micro-residue. This ensures a streak-free, crystal-clear finish.
Step 5: Inspect and Reassemble
Hold the lens up to a light source and examine it from multiple angles for any remaining spots, streaks, or smudges. If you find any, repeat the process with a fresh cloth section. Once satisfied, reassemble any removed components, reinstall the lamp if applicable, and reconnect power.
Frequency of Cleaning and Additional Tips
How often should you clean your projector lens? For heavy-use environments such as corporate boardrooms, schools, or entertainment venues, cleaning every one to two weeks is recommended. For home theater use with occasional operation, monthly cleaning suffices. However, always inspect the lens visually before each use; if you notice haze, spots, or reduced image clarity, clean immediately.
Additional tips include: never use your breath to fog the lens (moisture and oils from breath can leave residue), never use window cleaner or household glass cleaners (they contain chemicals harmful to lens coatings), and always store your cleaning solution in a cool, dark place to maintain its effectiveness.
The Role of Quality Accessories in Overall Maintenance
While cleaning solutions address surface contamination, the overall health of a projection system depends on the quality of its core components. A high-performance lens, such as those provided by Zorsika, is engineered with superior optical design and coatings that are inherently more resistant to environmental degradation — but even the best lens requires proper care. Similarly, Zorsika's projector lamps, developed through direct partnerships with leading manufacturers like Philips, Osram, Ushio, and Phoenix, and featuring self-developed lamp cores that achieve over 95% of original lamp brightness and over 90% of original lamp lifespan, represent a cost-effective alternative to OEM replacements. Zorsika also produces custom-developed projector filters with excellent airflow rates that protect internal components from dust and smoke, reducing the frequency of internal contamination and extending the need for deep servicing. With annual heavy investment in R&D, Zorsika continuously innovates to meet evolving market demands, serving global partners with products that combine quality, longevity, and value.
Conclusion
The correct spraying and usage of projector lens cleaning solution is a simple yet vital skill that every projector owner and technician should master. By following the outlined preparation steps, applying the solution to the cloth rather than the lens, using gentle circular motions, and maintaining a regular cleaning schedule, users can preserve optical excellence and extend the life of their projection equipment. In a broader sense, investing in quality components — from precision-engineered lenses to long-lasting lamps and protective filters — and pairing them with disciplined maintenance practices creates a projection system that delivers stunning, reliable performance year after year. Companies like Zorsika exemplify this philosophy, providing the tools and accessories that professionals worldwide depend on to keep their projectors shining bright.