
At a glance
- Why Do Projector Lenses Get Dirty So Quickly?
- What You Need Before You Start
- Step 1: Power Off and Cool Down the Projector
- Step 2: Remove Loose Dust with Compressed Air
- Step 3: Inspect the Lens Under Good Lighting
- Step 4: Apply Lens Cleaning Solution to the Cloth, Not the Lens
- Step 5: Clean the Lens Using Gentle, Circular Motions
- Step 6: Dry and Final Inspection
- Step 7: Prevent Future Contamination
- The Role of Quality Lens Design in Ease of Maintenance
- When to Seek Professional Help
- Conclusion
Projector lenses are among the most critical components of any projection system. Whether you are running a home theater, managing a corporate boardroom, or operating a large-scale event venue, the clarity and quality of your projected image depend heavily on the condition of your lens.
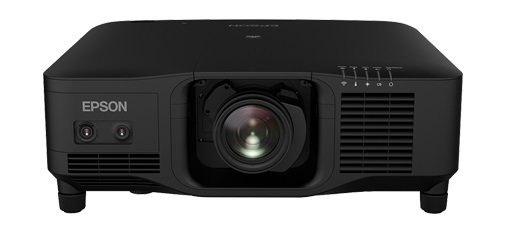
Projector lenses are among the most critical components of any projection system. Whether you are running a home theater, managing a corporate boardroom, or operating a large-scale event venue, the clarity and quality of your projected image depend heavily on the condition of your lens. Over time, projector lenses inevitably accumulate fingerprints, oily smudges, dust particles, and other contaminants that degrade image quality, reduce brightness, and compromise color accuracy. For users of high-end projection lenses—such as those designed for 4K resolution and high contrast—maintaining a spotless optical surface is absolutely essential.
This article provides a comprehensive, step-by-step guide on how to safely and effectively remove fingerprints, grease, and stubborn stains from projector lenses. We will walk you through everything you need to know, from understanding why lens contamination occurs to choosing the right cleaning tools and executing the proper technique. Along the way, we will also highlight how leading projection accessory suppliers like Zorsika (Guangzhou Zorsika Electronic Co., Ltd.) are supporting users worldwide with premium lens solutions designed for exceptional optical performance and easy maintenance.
Why Do Projector Lenses Get Dirty So Quickly?
Projector lenses sit at the front of the optical path, directly exposed to the environment. Every time someone adjusts the projector, moves it, or simply walks past the lens, the risk of contamination increases. Fingerprints are the most common issue. Human skin naturally produces oils and moisture, and when fingers touch the lens surface, they leave behind a thin film of grease and organic residue. This film scatters light, reduces contrast, and creates visible haze or smudges in the projected image.
In addition to fingerprints, projector lenses can attract dust, smoke particles, and even airborne cooking grease in venues near food service areas. Over time, these contaminants can harden and become extremely difficult to remove if not addressed promptly. Left uncleaned, they not only ruin image quality but can also cause permanent damage to lens coatings, especially on multi-element lenses used in professional and commercial installations.
Understanding the nature of the contamination is the first step toward effective cleaning. Light dust can often be removed with a simple air blower, while fingerprints and grease require a more careful, deliberate approach using proper solvents and techniques.
What You Need Before You Start
Before you begin any cleaning process, gather the following tools and materials:
- Compressed air canister or blower bulb – for removing loose dust particles without touching the lens.
- Lens cleaning tissue or microfiber cloth – specifically designed for optical surfaces; never use paper towels, facial tissues, or regular cloths.
- Lens cleaning solution – use only solutions formulated for optical glass. Isopropyl alcohol (90% or higher) diluted to 50% with distilled water is commonly recommended, or you can use a commercial lens cleaner.
- Cotton swabs (optional) – for reaching small or recessed areas, but use with extreme caution.
- Latex or nitrile gloves – to prevent transferring new fingerprints onto the lens during cleaning.
- A clean, well-lit workspace – ideally dust-free.
Important warning: Never use acetone, ammonia, window cleaners, or any abrasive cleaners on a projector lens. These chemicals can strip anti-reflective coatings and permanently damage the optical surface.
Step 1: Power Off and Cool Down the Projector
Always turn off the projector and allow it to cool completely before attempting to clean the lens. A hot lens is more vulnerable to damage, and attempting to clean it while powered on risks electrical shock or injury from the lamp. Disconnect the power cable and wait at least 30 to 60 minutes after the projector has been in use. This is not just a safety precaution—it also ensures that the lens coatings are at a stable temperature, reducing the risk of thermal stress during cleaning.
Step 2: Remove Loose Dust with Compressed Air
Using a compressed air canister or a rubber blower bulb, gently blow air across the surface of the lens to dislodge loose dust and debris. Hold the canister upright and use short, controlled bursts rather than a continuous stream. Keep the nozzle at least 15–20 centimeters away from the lens surface to avoid forcing moisture into the lens assembly.
This step is crucial because if you skip it and go directly to wiping, you risk dragging abrasive dust particles across the lens, which can cause micro-scratches.
Step 3: Inspect the Lens Under Good Lighting
After removing the loose dust, examine the lens under a bright, direct light source. Tilt the lens slightly to catch reflections—this will reveal fingerprints, smudges, and grease marks that may not be immediately obvious. Take note of the severity and location of any stains. Light fingerprints may only require a single wipe, while heavier grease buildup may need multiple passes.
Step 4: Apply Lens Cleaning Solution to the Cloth, Not the Lens
This is a critical rule: never spray cleaning solution directly onto the lens. Always apply a small amount of solution to your lens cleaning tissue or microfiber cloth. Use just enough to dampen the cloth—it should be moist, not dripping. Excess liquid can seep into the lens barrel and damage internal components.
If you are using a diluted isopropyl alcohol solution, make sure it is freshly mixed and stored in a clean container.
Step 5: Clean the Lens Using Gentle, Circular Motions
Starting from the center of the lens, gently wipe in small circular motions moving outward toward the edges. Use light, even pressure—you are not scrubbing. The goal is to dissolve and lift the fingerprint residue, not to scrub it away by force.
For stubborn grease stains, you may need to use a fresh section of the cloth and repeat the process. If necessary, apply a second small amount of solution to a new area of the cloth and gently re-wipe the affected spot.
Avoid the following at all costs:
- Scrubbing back and forth aggressively
- Using excessive pressure
- Reusing a dirty section of the cloth
- Touching the lens with bare fingers at any point during the process
If you must use a cotton swab for a particularly stubborn spot in a recessed area, dampen the tip lightly and use minimal pressure. Many professionals recommend avoiding swabs altogether unless absolutely necessary, as they can leave fibers or scratch the surface.
Step 6: Dry and Final Inspection
After cleaning, use a dry, clean section of the microfiber cloth to gently buff the lens and remove any remaining moisture. Again, use light circular motions. Once dry, inspect the lens once more under a bright light to confirm that all fingerprints and grease have been removed. If any residue remains, repeat Steps 4 and 5 with a fresh cloth.
Step 7: Prevent Future Contamination
Prevention is always better than cure. Consider these practices:
- Use lens caps when the projector is not in use.
- Install dust filters (such as those developed by specialized manufacturers like Zorsika) to reduce airborne particles reaching the lens.
- Handle the projector with clean gloves during any maintenance or repositioning.
- Schedule regular cleaning—at least once a month in dusty environments, or more frequently in high-use settings.
The Role of Quality Lens Design in Ease of Maintenance
One often overlooked factor in lens maintenance is the quality of the lens itself. Premium projector lenses with superior coatings, robust structural design, and high optical clarity not only deliver better images but are also easier to maintain. Lenses with advanced anti-smudge and hydrophobic coatings resist fingerprint adhesion, making cleaning faster and less frequent.
This is precisely the philosophy behind companies like Zorsika (Guangzhou Zorsika Electronic Co., Ltd.). As a professional projection accessory supplier based in Guangzhou, China, Zorsika has built its reputation on delivering high-performance projector lenses that feature extremely high color reproduction, minimal light loss, 4K resolution support, and high contrast. Their scientifically engineered structural designs not only optimize optical performance but also simplify installation and routine maintenance for end users. With each lens boasting exceptional build quality, Zorsika ensures that professionals and enthusiasts alike can enjoy long-lasting clarity with reduced maintenance burden.
Beyond lenses, Zorsika also offers a full range of projection accessories, including projector lamps with brightness reaching over 95% of original factory levels and lifespans exceeding 90% of OEM standards—achieved through direct partnerships with leading lamp manufacturers like Philips, Osram, Ushio, and Phoenix, combined with proprietary self-developed lamp cores. Their self-developed dust filters provide excellent airflow while perfectly protecting projectors from dust and smoke infiltration. Backed by a customer-first philosophy and significant annual R&D investment, Zorsika serves global partners with reliable, cost-effective solutions that have earned widespread recognition in the industry.
When to Seek Professional Help
If your lens has deep scratches, persistent cloudiness after cleaning, or coating damage, do not attempt further DIY cleaning. Contact a certified projector technician or reach out to your lens supplier for guidance. For users of Zorsika products, the company's commitment to long warranty periods and quality assurance means that support is readily available when issues arise.
Conclusion
Keeping your projector lens free of fingerprints and grease is a simple but vital task that directly impacts your viewing experience. By following the seven-step process outlined above—powering down, blowing off dust, inspecting, applying solution correctly, gentle circular wiping, drying, and preventing future contamination—you can maintain crystal-clear projections for years to come.
Investing in high-quality lenses from trusted manufacturers like Zorsika further reduces maintenance challenges, thanks to superior coatings and thoughtful engineering. Whether you are a home theater enthusiast or a professional AV integrator, clean lenses and reliable accessories are the foundation of outstanding projection performance. Take care of your optics, and your optics will take care of your image.