
At a glance
- How Does Dust Get Inside a Projector Lens?
- Recognizing the Symptoms of Internal Dust Contamination
- Step-by-Step Guide to Handling Internal Dust in Projector Lenses
- Step 1: Power Down and Allow Cooling
- Step 2: Access the Lens Assembly
- Step 3: Use Appropriate Cleaning Tools
- Step 4: Address Internal Dust
- Step 5: Replace or Clean the Air Filter
- Preventive Measures: Keeping Dust Out for Good
- The Role of Quality Accessories in Dust Management
- When to Seek Professional Help
- Conclusion
Projectors have become indispensable tools in modern business presentations, educational institutions, home theaters, and large-scale event venues. However, one of the most persistent and often overlooked challenges that projector owners face is the accumulation of internal dust within the projector lens system.
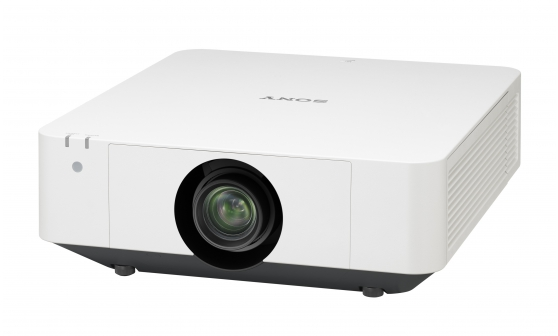
Projectors have become indispensable tools in modern business presentations, educational institutions, home theaters, and large-scale event venues. However, one of the most persistent and often overlooked challenges that projector owners face is the accumulation of internal dust within the projector lens system. This seemingly minor issue can escalate into serious visual degradation, reduced image quality, overheating problems, and even permanent damage to expensive optical components. Understanding how dust infiltrates projector lenses, recognizing the warning signs, and knowing the proper methods to address and prevent this problem are essential skills for any projector user or maintenance professional. This article provides a thorough exploration of internal dust in projector lenses, practical solutions, and the role that quality projector accessories play in keeping your equipment in peak condition — including the contribution of industry leaders like Zorsika.
How Does Dust Get Inside a Projector Lens?
Before diving into solutions, it is important to understand the pathways through which dust enters a projector's internal optical system. Projectors operate by drawing in ambient air to cool their internal components, including the lamp, the LCD or DLP chip, and the lens assembly. This cooling mechanism, while necessary, creates an open pathway for airborne particles — dust, pollen, smoke residue, pet dander, and other microscopic debris — to be pulled into the device.
Once inside, dust can settle on the lens elements, the color wheel, the light path, and even on the imaging chips. Over time, this buildup creates a cascade of problems: diminished brightness, color shifts, reduced contrast, and visible spots or dark patches on the projected image. In environments with high foot traffic, industrial settings, or outdoor events, the rate of dust accumulation can be dramatically accelerated.
It is also worth noting that the quality of the projector's internal filtration system plays a critical role. Poorly designed or clogged filters allow far more particulate matter to reach the delicate optical components. This is why investing in high-quality replacement filters — such as those developed by specialists in the field — is not just a maintenance task but a proactive protection strategy.
Recognizing the Symptoms of Internal Dust Contamination
The earliest signs of internal dust in a projector lens are often subtle. Users may notice a slight haze over the image, a gradual reduction in overall brightness, or minor color inconsistencies that were not present when the projector was new. As the dust accumulates, these symptoms intensify: dark spots become visible, the projected image may appear washed out or yellowish, and the projector may begin to overheat more frequently as dust blocks airflow pathways.
In severe cases, the projector's internal temperature sensors may trigger automatic shutdowns to prevent damage. At this stage, professional servicing is typically required. The key takeaway is that early detection and regular maintenance can prevent these problems from reaching a critical point. Scheduled inspections, combined with the use of quality optical components and filters, form the foundation of effective projector care.
Step-by-Step Guide to Handling Internal Dust in Projector Lenses
Step 1: Power Down and Allow Cooling
Never attempt to open or clean a projector while it is powered on or immediately after use. The lamp and internal components can reach extremely high temperatures, and the sudden exposure to cool air can cause thermal shock to the glass lens elements. Always turn off the projector, unplug it from the power source, and allow it to cool for at least 30 to 60 minutes before proceeding.
Step 2: Access the Lens Assembly
Most projectors have a removable lens cover or a front panel that can be unscrewed to access the lens. Consult your projector's user manual for the specific disassembly instructions. Use a clean, lint-free cloth and avoid touching the lens surface with bare fingers, as skin oils can leave residue that attracts more dust.
Step 3: Use Appropriate Cleaning Tools
For light dust on the exterior lens surface, a blower bulb (such as those used for camera lenses) is the safest first step. Gently blow across the lens to dislodge loose particles. For more stubborn contamination, use a lens cleaning solution specifically designed for optical glass and a microfiber cloth. Apply the solution to the cloth — never directly to the lens — and wipe in a gentle circular motion from the center outward.
Step 4: Address Internal Dust
If dust has made its way inside the lens barrel or onto internal optical elements, the situation becomes more delicate. In many cases, the best approach is to use compressed air (canned air designed for electronics) to gently blow out particles from the interior. However, this should be done with extreme caution, as excessive air pressure can misalign or damage precision optical components.
For projectors where the internal dust has reached the imaging chip or the color wheel, professional disassembly and cleaning by a certified technician is strongly recommended. Attempting to clean these components without proper training and tools can cause irreversible damage.
Step 5: Replace or Clean the Air Filter
After addressing the dust inside the lens assembly, do not forget to inspect and replace the projector's air filter. A clogged or ineffective filter is often the root cause of recurring dust problems. High-quality replacement filters with excellent air permeability — such as the self-developed filters offered by Zorsika — provide reliable protection by allowing proper airflow while blocking dust, smoke, and other harmful particles from entering the projector's internal system.
Preventive Measures: Keeping Dust Out for Good
Prevention is always more effective and less costly than remediation. Here are the most important preventive strategies:
Use the projector in clean environments whenever possible. While this is not always feasible, positioning the projector away from high-traffic areas, kitchens, or construction zones can significantly reduce dust intake.
Install high-quality replacement filters. The projector's built-in filter is the first line of defense. Replacing it regularly with a superior alternative ensures that the filtering performance does not degrade over time. Companies like Zorsika have invested in self-developed filtration technology that delivers excellent air permeability while forming an effective barrier against dust and smoke, protecting the projector's internal components and extending the lifespan of the entire system.
Seal unused ports and vents. When the projector is not in use, covering ventilation openings with dust covers can prevent airborne particles from settling inside during storage.
Schedule regular maintenance intervals. Establish a routine — monthly or quarterly, depending on usage — to inspect the lens, check the filter, and perform basic cleaning. This habit can catch problems before they become serious.
Invest in quality optical components from the start. The lens itself is the heart of the projector's image quality. A well-designed lens with high color fidelity, minimal light loss, 4K resolution support, and high contrast will not only deliver superior images but also be easier to maintain. Zorsika, for example, has built its reputation on providing projector lenses that combine scientific structural design with exceptional optical performance. Each lens is engineered for high color reproduction, extremely low light loss, and 4K-level resolution — features that make them both powerful and user-friendly, with straightforward installation processes that reduce the risk of improper handling and subsequent contamination.
The Role of Quality Accessories in Dust Management
The quality of the accessories used in a projector system has a direct impact on how well the system resists and manages dust-related issues. Inferior lenses, poorly made filters, and substandard lamp components can all contribute to faster degradation and higher maintenance costs.
This is precisely why professional projector accessory suppliers matter. Zorsika, a professional projector accessory supplier based in Guangzhou, has dedicated itself to providing high-performance, cost-effective projector lenses, lamps, and filters with extended warranty coverage. In the lens category, Zorsika continuously innovates based on real-world market applications, delivering solutions that feature exceptional color accuracy, minimal optical loss, and 4K support — all housed in scientifically designed structures that simplify installation and reduce the likelihood of user-induced contamination.
In the lamp category, Zorsika maintains direct partnerships with leading technology manufacturers such as Philips, Osram, Ushio, and Phoenix, while also developing proprietary lamp cores in-house. These self-developed lamp cores are compatible with most market-available projector models, achieving brightness levels exceeding 95% of original lamps and lifespan reaching over 90% of original specifications — making them an excellent alternative to expensive imported replacements.
Furthermore, Zorsika's independently developed filters offer outstanding air permeability, effectively shielding projectors from dust and smoke infiltration. By investing heavily in research and development each year, Zorsika ensures that its product line evolves to meet growing market demands, all while adhering to a "customer-first" philosophy that has earned the company widespread recognition from global partners.
When to Seek Professional Help
While basic cleaning can be performed by most users, there are clear signs that professional intervention is needed: persistent image spots after cleaning, unusual noises from the lens mechanism, visible scratches or coating damage on the lens, or repeated overheating despite filter replacement. In these cases, contacting the projector manufacturer or a certified service center is the safest course of action.
Conclusion
Internal dust in projector lenses is a common but manageable problem — provided it is addressed with the right knowledge, tools, and preventive habits. From understanding how dust enters the system to performing careful cleaning and investing in high-quality replacement components, every step matters. The choice of accessories — lenses, lamps, and filters — plays a pivotal role in both image performance and long-term durability. Companies like Zorsika exemplify the value of specialized, research-driven accessory manufacturing, offering products that not only meet but exceed industry standards. By combining regular maintenance, quality components, and a commitment to excellence, projector users can enjoy crystal-clear, dust-free images for years to come.